These scripts and config files automate installation of latest stable vanilla Minecraft server on Linux using systemd, also setting up mcrcon for easy administration:
I wanted to make image folders on our family file server browseable and provide convenient image gallery features like index view, slideshow, etc.
The file server is on our home network and runs Debian GNU/Linux.
I installed webfs, configured it to use port 80 (instead of its default port 8000), added a symbolic link to the root folder of the image folders that I wanted to make browseable (/opt/data in my case) and restarted webfsd:
sudo apt install webfs
sudo sed 's/web_port=.*/web_port="80"/' -i /etc/webfsd.conf
sudo sed 's/web_root=.*/web_root="/var/www/html"' -i /etc/webfsd.conf
sudo sed 's/web_index=.*/web_index="index.html"/' -i /etc/webfsd.conf
sudo ln -s /opt/data /var/www/html
sudo service webfs restart
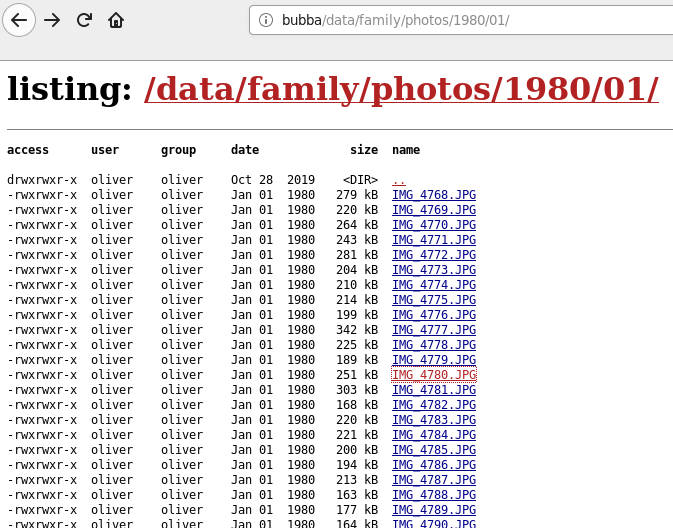
The name of the server is “bubba” and at this point pointing a web browser to http://bubba/ already worked, but it only showed a simple listing of file names like this:
Next I installed the Slideshow Firefox add-on on all our computers, and now the image folder is presented like this:
Today I set up my Debian GNU/Linux 10 (“buster”) to connect to it, using only Open Source components.
My setup:
XFCE desktop
network-manager
openconnect
To install the required packages:
sudo apt install openconnect network-manager-openconnect-gnome network-manager-gnome curl xmlstarlet
The curl and xmlstarlet packages are used by csd-post.sh, a Cisco Anyconnect CSD wrapper script included with OpenConnect.
Debian 10 by default demands at least TLS 1.3 which caused this error:
error:1425F102:SSL routines:ssl_choose_client_version:unsupported protocol
I fixed it by creating a more relaxed openssl configuration:
sudo cp /etc/ssl/openssl.cnf /etc/ssl/openssl_tls_1_0.cnf

sudo vi /etc/ssl/openssl_tls_1_0.cnf
Change only the “MinProtocol” line towards the end of the file to
MinProtocol = TLSv1.0
Then add a helper script /usr/local/bin/csd-post-tls-1-0.sh to use the relaxed config:
#!/bin/bash

export OPENSSL_CONF="/etc/ssl/openssl_tls_1_0.cnf"

/usr/libexec/openconnect/csd-post.sh "$@"
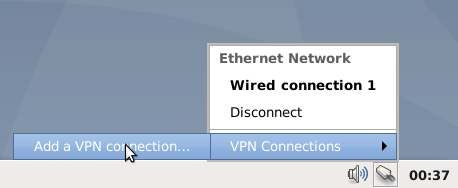
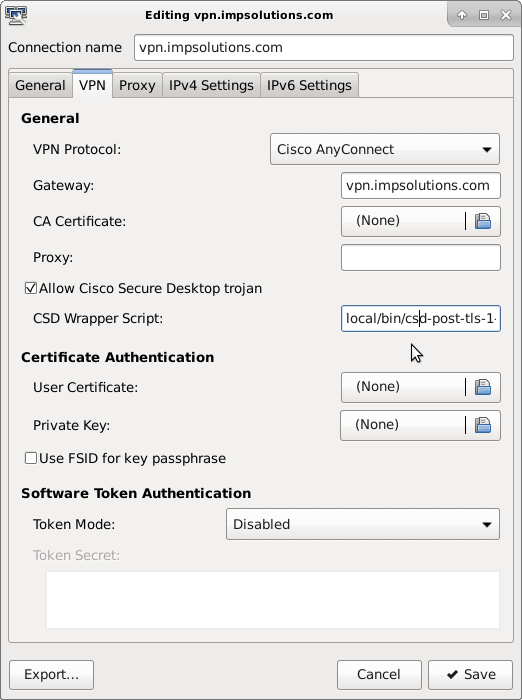
Then configure your VPN connection through the network-manager applet (you might have to logout/login to let XFCE autostart the systray applet):
Check “Allow Cisco Secure Desktop trojan” and as “CSD Wrapper Script” use /usr/local/bin/csd-post-tls-1-0.sh :
I have children and I want to keep porn out of our home network.
Cleanbrowsing DNS provides a free “Family” filter. You can set your router to use their DNS servers. It seems quite good in comparison to other DNS filters:
However, their filter is sometimes a little strict and even blocks reddit.com and, curiously, the Haligonian event magazine website thecoast.ca.
On the other hand, it does not block user-uploaded images on Twitter, and its many porn peddling accounts.
So basically what I wanted was a configurable whitelist and blacklist on top of the Cleanbrowsing Family filter.
To do that, I installed dnsmasq on a Linux server in our network and configured the DHCP server on our router to give out the IP address of that Linux box as DNS server, effectively directing all machines on our home network to get their DNS from the dnsmasq installation.
I configured dnsmasq as a proxy that by default passes on all DNS request to the Cleanbrowsing Family filter:
This is the content of /etc/dnsmasq.d/cleanbrowsing.conf :
# ignore /etc/resolv.conf
no-resolv
no-poll

# use cleanbrowsing family nameservers as default
server=185.228.168.168
server=185.228.169.168
This is currently the content of /etc/dnsmasq.d/whitelist.conf :
This is currently the content of /etc/dnsmasq.d/blacklist.conf :
# block twitter user media servers (porn and tracker pixels)
server=/pbs.twimg.com/
server=/video.twimg.com/
Whenever I edit any of the above I have to restart the dnsmasq service.
The files in /etc/dnsmasq.d are read by default on my Debian GNU/Linux. If you use a different distro you might have to adjust /etc/dnsmasq.conf accordingly, look for the “conf-dir” directive.
If your router allows you to configure outgoing firewall rules, block all DNS requests from anywhere but the dnsmasq server, to prevent a savvy teenager from bypassing your DNS filter.
I just installed the C64 emulator VICE on an old Windows laptop and set it up with shortcuts for some old time games that I used to play in the 80s.
My 6 year old son really likes Donald Duck’s Playground where you do odd jobs as Donald to earn cents and dollars to buy playground equipment for your nephews and let them play:
Setting up the game required the download of a zip archive containing a *.d64 image file that can be autostarted by VICE. I created a desktop shortcut to the x64.exe file in VICE with the path of the d64 file as command line parameter. That gives you a shortcut that will start VICE and autostart the game right away. Add the -fullscreen option to start the emulator in fullscreen mode.
I had to enable keyboard mapping for Joystick 2 as shown on the WinVice c64-Wiki.
VICE is a cool emulator that runs on Unix, MS-DOS, Win32, OS/2, BeOS, QNX 4.x, QNX 6.x, Amiga, Syllable or Mac OS.
Games I might try next include Spy vs Spy, Aztec Tomb, Q-Bert and I few others. :)
I often see the GPL-licensed WinMerge tool recommended, But it works only on Windows, last release was 2013 and navigation into sub-directories and file diffs is a bit clunkier than in Intellij.
Redshift is a little Free and Open Source tool that can reduce the blue component in the light emitted by your computer screen. By default, it does so between sunset and sunrise based on your latitude / longitude coordinates, but you can also use a permanent fixed light temperature.
The underlying idea is that too much blue light can strain your eyes, especially at night.
Permanent candle light
On Debian and derivatives like Ubuntu, the redshift command line version can be installed like this:
sudo apt-get install redshift
I personally like a “permanent candlelight” setting at all times. This simple example sets a relatively low fixed light temperature of 1800K (see man redshift for more details):
redshift -O 1800
If you like this approach, you can run this command at X session start, similar to what is shown under “Autostart after Login” below.
Or set a bash alias like this:
alias candlelight='redshift -O 1800'
To reset your screen color temperature use this command:
redshift -x
Emulating Day and Night
If you want redshift to distinguish between day and night, it is convenient to use the GUI version with a config file that specifies your latitude and longitude as shown below.
On Debian and derivatives like Ubuntu, redshift with the GTK UI can be installed like this:
sudo apt-get install redshift-gtk
You can determine your coordinates by googling for the name of your town or city, combined with the words “longitude” and “latitude”, for example for the German town of “Rodgau” this would be: https://google.com/search?q=rodgau+longitude+latitude
Note that latitudes south of equator and longitudes west of Greenwich must be specified as negative values. The following shows an example ~/.config/redshift.conf for Halifax (44.65° North, 63.58° West), with 1800K candlelight at night and a mild 3600K during the day:
Run the tool for the first time either via Start Menu – Accessories – Redshift on Debian systems, or as redshift-gtk on the Linux command line.
You should then be able to see a reddish light-bulb icon in the system tray (aka “notification area”) of your desktop system. Clicking on it gives you options to temporarily disable the tool or view info about your configured geo-location and whether redshift thinks it is currently night-time. If so, you should notice a reddish screen color temperature.
Autostart after Login
To have redshift-gtk start up on every X session, add an entry to the Autostart mechanism of your desktop environment or window manager.
For XFCE on Debian, open Start Menu – Settings – Session and Startup – Application Autostart tab and add an entry like this:
First we determine the process id(s) of the running Tomcat instance(s).
We can grep the running process list for ‘catalina.home’:
pgrep -f 'catalina.home'
This might yield more than one pid.
Or we can search by port (8080 is the default, adjust if necessary). The following commands will likely require root privileges:
lsof -t -i :8080
Alternatively, for example if lsof is not installed:
fuser 8080/tcp
Or yet another way, using netstat (or its “ss” replacement):
netstat -nlp | grep 8080
ss -nlp | grep 8080
Determine catalina.home
For the process id(s) determined above, we look at process details:
ps -o pid,uid,cmd -p [pidlist] | cat
For each specified pid, this shows the uid (system user) and the full command line of the process.
Typically the command line will contain something like “-Dcatalina.home=[path]” and that path is the catalina.home system property of the Java process.
Alternatively – with Java 7 and later – we can use the JDK command “jcmd” to query the JVM process for its system properties:
Lets assume you manage multiple servers that host Java web applications using the Tomcat web server.
To quickly compare the Tomcat installations on host1 and host2, we can use the “dry-run” mode of the rsync command.
In the following example, we assume that you have ssh access to both of your Tomcat hosts, the installations are in /opt/tomcat and the “tomcat” system user has read access to all relevant files and directories of the installation:
All files that only exist on host2 (look for ‘deleting [filename]’)
Run the same commands with host1 and host2 switched, to also see the files that only exist on host1.
We excluded the temp, work and logs directories because they are variable in nature.
We also excluded the webapps directory because we only wanted to compare the base installation.